Printmaking
There are many techniques and styles of printmaking. I have experimented with a few. A print can be made when you use some kind of transferrable medium (ink, paint, etc.) on a plate or matrix (made of wood, plastic, metal, etc.) and then remove that medium from the plate by using paper (or some other kind of surface), which leaves a reversed imprint of the image on that paper surface from the original plate.
An edition is a run of a number of prints. The number on a print, usually on the bottom left-hand corner, indicates first the number of the print in the run, then the total number of prints produced in that run. Letters after the edition number can mean any number of things. If you are using more than one plate to generate your final print (e.g. because of multiple colours), it is vital to register or align the plate and paper consistently every time, otherwise, the final image will be wonky. All prints produced through these techniques are hand made, and as a result, variations can occur between each print produced.
*****
Monotype & Monoprint
These terms are often used interchangably; however, I like to think of them as completely different techniques. Both printmaking techniques result in a "one-off" image; you can never repeat that image. Some people have difficulty understanding how this can be a print if only one is produced, but it is the method of production that makes it a print. Probably the best description of the differentiation between these two techniques can be found in Monotype - Mediums and Methods for Painterly Printmaking by Julia Ayres:
"...the term monotype is used for work developed on top of an unaltered plate, utilizing its flat surface, while monoprint refers to monotype work that also includes elements of another printmaking process such as etching, woodcut, lithography, silk screen, and so on." (Watson-Guptill Publications, New York, 1991, page 8)
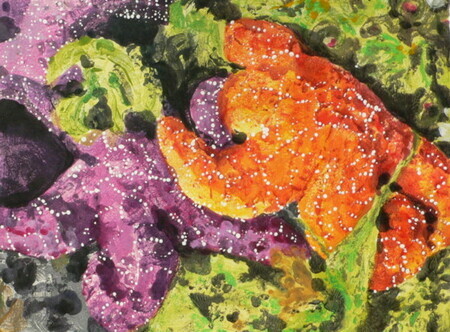
I use either watercolour or acrylic paints to produce monotypes. I paint onto frosted mylar, and while the paint is still wet, I make the transfer by laying a registered sheet of paper over the mylar and pressing gently by hand on the back of that paper. I repeat the process until I've completed the image. There is another method whereby you prepare the surface of the plate so that you can paint the image in its entirety, leave the paint to dry, then use a moistened sheet of paper to lift the image. I find this method more restrictive, but many artists prefer it because there is an added level of control to how the printed image will turn out.
I have combined relief printing techniques with monotype printing to produce monoprints. I love the unpredictability of monotypes; you never quite get what you expect, because the paint never transfers with perfection. The textures that result from this imperfect impression are magical, and cannot be produced through any other technique.
Relief Print
All relief printmaking techniques require some removal of the matrix material (e.g. wood, linoleum, etc.), usually with carving tools. Anything that has been removed will not be printed - only the material that is left behind will pick up ink. After carving the image into the matrix, a brayer is used to roll ink onto the surface. Rolling successive thin layers is the goal - too much ink, and the print will be blobby; not enough, and it will be faint or missing elements. Once the plate has been brayered with ink, paper is placed onto the surface and the back gently rubbed, or if you have a press, you can pass both plate and paper through the press. Currently, I use a wooden spoon to transfer the image from plate to paper, so all of my prints are definitely hand produced. This process is repeated until the artist is satisfied with the number of quality prints, and the edition is created. The plate should be altered or destroyed once an edition is complete, so that no further prints can be made.
I use a product called Saf-t-cut (or SpeedyCut), which is much like a big piece of rubber eraser. It is very easy to cut, but it doesn't hold lines as well as linoleum or wood, which can result in much finer lines in the final print. I sacrifice this precision to a slight degree in order to save my body - it's hard work carving a hard surface.
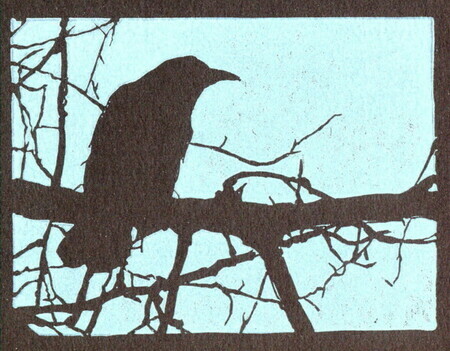 If I am producing an image that uses only one colour of ink, I can use a single block of material. It's easiest to start off with black and white - if you're using black ink, you'll be carving away the bits of the image you want to stay white. I've been playing with coloured inks on black paper, so I carve away what I want to stay black. Same idea, but it's kind of neat, because I can get really complex images without as much carving.
If I am producing an image that uses multiple colours of ink, there are a few options to do so. My first experimentation with that ended up with a kind of monoprint result - I painted my inks with the brayer onto the surface of the plate and pulled the print. This produces a lovely, loose, multicoloured image but with just one plate.
I produced one print where I used one plate, but then cut out acetate sheets to block what parts of the plate I didn't want to print in a given colour. That was tricky, because it was hard to not get the acetate inky, or to have ink smear from under the acetate. It's an interesting technique to keep in mind, but not one I'll likely use regularly.
My next trial was with multiple plates - each plate represents a different colour. This is where registration comes in as very important. I've ruined a lot of prints from off registration, but that's just part of learning.
Lately, I've been immersed in reduction cut plates. As far as I'm concerned, this is a great way to get lots of colours onto the image. This requires quite a bit of thinking to develop an image where the colours work together, especially because subsequent colours layer over top of earlier ones. For pure, clean colour, multiple plates is pretty much the only option, but I find the challenge of reduction cut fascinating.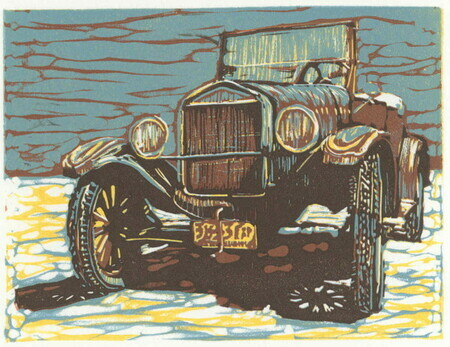
The technique involves starting with a block that you then carve away whatever you want to leave as the paper colour. Then you take your first ink colour and print that. Once you've done a number of prints with that first colour (the carved away voids show the paper colour, so you now have two colours on the image), you cut away anything that you want to stay that first ink colour. Now you print again with a second ink colour, resulting in a total of three colours of print. Keep going until you have used all the colours you need. This can be fairly simple, or very complicated.
Wood Engraving
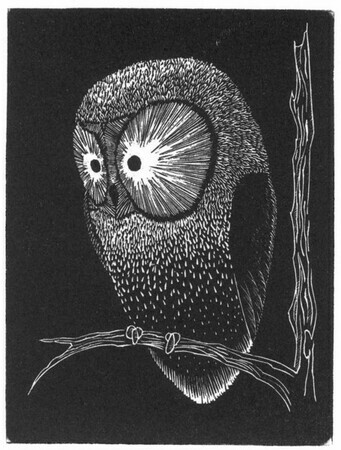 Wood engraving is another type of relief print, but you use an extremely hard wood, cut on the end grain, to carve your image into. You use gravers to do the cutting, which are an entirely different shaped tool than those used for wood cut or lino cut. Because you need to carve away the white (non-printing) areas, and because it requires much work to remove the small amounts of material using the gravers, wood engravings tend to be fairly small in size. I took a course through Emily Carr as an introduction to this technique with a very skilled printmaker, Shinsuke Minegishi. While I won't likely be doing many, I am happy to have an option for highly detailed relief work in my portfolio.
Stone Lithography
Stone lithography is a printmaking method I have just recently tried. It is an extremely process oriented technique, but with fantastic results. I saw an image in a book that looked like a beautiful conté drawing, but the medium was listed as "lithograph". I was intrigued - I had no idea what lithography entailed. Then recently I met Patrick Hill who works mostly using stone lithographic techniques, and he introduced me to the general process. The matrix can be either limestone or marble, because both types of stones have water- and grease-loving properties; you exploit these characteristics in order to create your print. You can make any mark on the stone with a grease-containing medium (e.g. tusche, grease pencil, etc.), then work through a process to make those marked areas more receptive to ink, and the areas without marks as less receptive. While printing, you keep the stone moist so that the ink doesn't stick to those areas that you don't want printed. It is a fascinating, involved process, but I really enjoy it. I am hoping to experiment further with this technique in Pat's workshop, Pal Press.
*****
Regardless of what technique is used to create a print, the inks are not all the same, and react differently to each other than they might on their own. They also react differently depending on whether the colours are layered (either with multiple plates or with reduction cut), or blended (as in my monoprint example), or mixed. The craftsmanship, and development of the craft of printmaking, makes this a life long involvement. What makes printmaking such a delight to me is that moment of breathless anticipation between inking and pulling the print off of the plate. Obviously, as I get better, I will be better able to control certain factors, but the opportunity for imperfection and surprises will always be there, as the process of making the imprint is never quite perfect, even though we strive to make it so.


 If I am producing an image that uses only one colour of ink, I can use a single block of material. It's easiest to start off with black and white - if you're using black ink, you'll be carving away the bits of the image you want to stay white. I've been playing with coloured inks on black paper, so I carve away what I want to stay black. Same idea, but it's kind of neat, because I can get really complex images without as much carving.
 Wood engraving is another type of relief print, but you use an extremely hard wood, cut on the end grain, to carve your image into. You use gravers to do the cutting, which are an entirely different shaped tool than those used for wood cut or lino cut. Because you need to carve away the white (non-printing) areas, and because it requires much work to remove the small amounts of material using the gravers, wood engravings tend to be fairly small in size. I took a course through Emily Carr as an introduction to this technique with a very skilled printmaker, Shinsuke Minegishi. While I won't likely be doing many, I am happy to have an option for highly detailed relief work in my portfolio.
 recently I met Patrick Hill who works mostly using stone lithographic techniques, and he introduced me to the general process. The matrix can be either limestone or marble, because both types of stones have water- and grease-loving properties; you exploit these characteristics in order to create your print. You can make any mark on the stone with a grease-containing medium (e.g. tusche, grease pencil, etc.), then work through a process to make those marked areas more receptive to ink, and the areas without marks as less receptive. While printing, you keep the stone moist so that the ink doesn't stick to those areas that you don't want printed. It is a fascinating, involved process, but I really enjoy it. I am hoping to experiment further with this technique in Pat's workshop, Pal Press.